.png)
Cats are graceful and independent creatures, but their natural instincts often include one habit that can become problematic: scratching. While scratching helps cats stretch, exercise, and maintain their claws, it can also result in scratched furniture, damaged carpets, or even accidental injuries. One effective way to reduce this issue is by regularly trimming your cat’s nails.
Learning to trim your cat’s claws at home can seem intimidating at first. Many cat owners worry about hurting their pet or being scratched in the process. But with the right techniques, a bit of patience, and the proper tools, nail trimming can become a manageable—and even bonding—activity. This guide will walk you through everything you need to know about safely and successfully trimming your cat’s nails.
Why Cats Need Nail Trims
Cats’ claws grow continuously and are designed for climbing, hunting, and defending themselves. In the wild or outdoors, regular activity naturally helps wear down their claws. However, for indoor cats, this natural wearing down happens less often. Without trimming, their nails can become too long, sharp, or even grow into the paw pads, causing discomfort or infection.
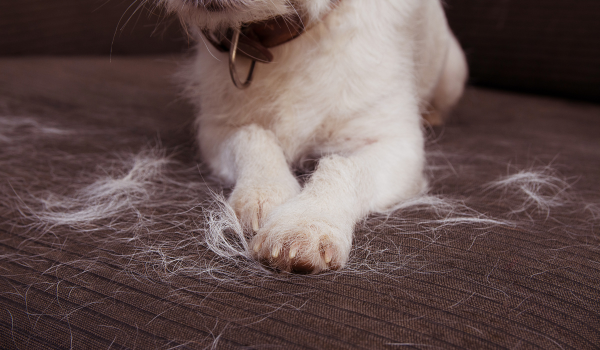
Additionally, long nails are more prone to getting caught in fabrics, furniture, or carpets. This can result in torn claws or broken nails, which are painful and sometimes require veterinary care. Regular nail trims help prevent these problems and contribute to overall paw health.
When and How Often to Trim
For most cats, a nail trim every 10 to 14 days is ideal. The exact frequency depends on your cat’s age, activity level, and health. Kittens and younger cats may require more frequent trims due to faster growth, while older or less active cats might need trimming less often.
It's best to start nail trimming when your cat is young so they can become familiar with the sensation and routine. However, cats of any age can be trained to tolerate (or at least accept) regular nail care with a gentle approach and consistency.
Step-by-Step Guide to Preparing Your Cat
1. Get Your Cat Comfortable With Paw Handling
Before you ever pick up the clippers, your first job is to help your cat become comfortable with having her paws touched. Spend a few minutes each day gently holding and massaging her paws. Speak in a calm, reassuring voice, and offer her favorite treats during and after each session.
Do this over a few days or even weeks if necessary. The goal is to associate paw handling with positive experiences.
2. Introduce the Clippers Gradually
Next, introduce your cat to the nail clippers. Let her sniff them and inspect them without attempting a trim. You can also simulate the clipping sound by snapping dry pasta to get her used to the noise. Reward her again with treats so she learns that the clippers are nothing to fear.
If you’re using a guillotine-style or scissor-style clipper, practice holding it in your dominant hand while holding your cat’s paw in the other. Get used to gently extending a claw by pressing down on the top and bottom of the toe. Do this without cutting, just as practice.
Trimming the Nails: What to Do
1. Choose the Right Moment
Pick a quiet time when your cat is relaxed—after a meal, or when she’s naturally sleepy, is often ideal. A calm cat is much easier to work with than one that’s alert and active.
You can hold your cat in your lap, let her lie on her side, or ask someone to gently hold her if she tends to squirm. Use a soft towel to wrap her body if she’s anxious, leaving one paw out at a time.
2. Identify the “Quick”
Examine the nail closely to find the “quick”—the pink area inside the nail where blood vessels and nerves are located. In cats with clear nails, the quick is visible. You should never cut into the quick, as it is painful and can cause bleeding. If your cat has dark nails, trim only the curved, pointed end to avoid hitting the quick.
3. Make the Cut
Once the claw is extended, clip only the sharp tip—usually about 1/16 of an inch. Work slowly and carefully. If it’s your first time, aim to trim just one or two nails per session. With practice, you’ll be able to trim more nails at once.
Always offer praise and treats after each nail to reinforce the positive experience.
What If You Accidentally Cut the Quick?
It can happen, especially when you're just learning. If you do cut into the quick and your cat's nail bleeds, remain calm. Apply styptic powder or cornstarch to the nail tip to stop the bleeding. Most minor cuts stop quickly, but keep an eye on the paw to ensure it doesn’t become infected.
After such an incident, stop the trimming session and give your cat time to recover. Resume another day once she’s relaxed again.
Tools You Can Use
There are several types of tools for trimming your cat's nails:
-
Guillotine Clippers: Good for smaller nails, these clippers have a hole for the nail and a blade that cuts as you squeeze the handles.
-
Scissor-Style Clippers: These resemble small scissors and are ideal for overgrown or thick nails.
-
Human Nail Clippers: While not ideal for long-term use, they can work in a pinch, especially for kittens or small cats.
Make sure your clippers are sharp and clean. Dull blades can crush the nail rather than cutting cleanly, which is painful and stressful for your cat.
Handling Resistance or Anxiety
Not every cat will sit still for nail trimming, especially at first. If your cat becomes stressed or resistant:
-
Take breaks. Try trimming one or two nails per day rather than all at once.
-
Wrap your cat in a towel (“cat burrito” method) to gently restrict movement without causing fear.
-
Use pheromone sprays or calming treats beforehand.
-
Avoid forcing your cat. The goal is long-term cooperation, not a single successful session.
Some cats may never fully tolerate nail trimming at home. In those cases, it’s best to ask a groomer or veterinarian for help.
Extra Tips for Success
-
Make it a Routine: Try to trim at the same time and place each session to create familiarity.
-
Use High-Value Treats: Reserve special treats your cat loves just for nail trims.
-
Stay Calm: Your energy affects your cat. Speak softly, move slowly, and don’t rush.
-
Monitor for Issues: Overgrown claws, cracked nails, or nails growing into the paw pad should be addressed by a vet.
Conclusion
Trimming your cat’s nails is an important part of maintaining her overall health and comfort. While the process may seem challenging at first, a patient and positive approach makes it easier over time. By preparing your cat slowly, using the right tools, and rewarding her consistently, you can turn nail trims into a routine grooming task that keeps both your cat—and your furniture—safe.
Remember: it’s not just about aesthetics—it’s about your cat’s well-being. Start small, be consistent, and don't hesitate to ask for professional guidance if needed. With a bit of effort, you and your cat will both be more at ease during every paw-dicure.


.png)

.png)
.png)
.png)
.png)